

A few weeks ago, I got a call to give a presentation on preparedness. My approach was not to focus on preparing for a rainy day, but to get out and have a great time learning outdoor cooking and camping skills. Then when the rainy day comes, your skills are up to speed.
One of the key places to practice your skills is in the backyard, a park, or in the woods. Decide to take the time now to enjoy your family and prepare them for their summer camps, outings and rainy days.
My parents were raised in the depression by pioneer parents. Creating and improvising was the norm. I grew up watching my mother and father make do with what we had instead of running to the store to buy the next item that was needed. A great byproduct of challenging times is that we have to look inward for solutions, instead of looking out. What a great skill to teach your children which will prepare them for whatever challenges come.
If you do not have a grill, here are some fun creative ways to use your ingenuity to make one. When you create using items you have, it shows you children it is possible to make do with what you have. What a great skill to develop.
Tin Can Grill
An improvised, inexpensive grill can be made in just a few minutes. This is a favorite of children at scouting and campfire cookouts. All that is needed is a #10-size can, tin snips, aluminum foil and a pair of safety gloves.
Beginning at the open end of the can, cut 2-inch-wide parallel slits down the side, to about 3 inches from the bottom, repeating around the can. Bend the strips away from the center of the can to form a low basketlike container. Fill the bottom of the can with dirt. Cover the dirt and strips with heavy duty aluminum foil. You have now created an improvised tin can grill. Place the charcoal on top of the foil and lay the grilling rack on top of the metal strips. It is important to keep
the distance between the grilling rack and the charcoal at about 3 to 4 inches (Bend the strips to this distance.)
Bonus of this grill is that it can be discarded after one use, and replaced at very little coast. Individual stoves can be made by a group to involve more people in the fun.
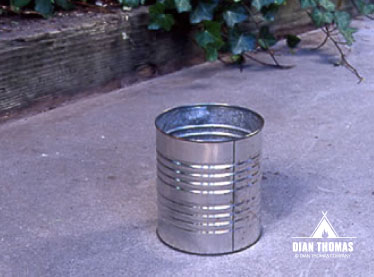
A #10-size tin can will make an easy and economical grill.
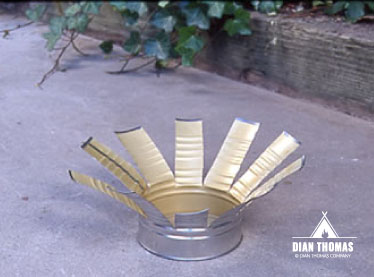
Use tin snips to cut two-inch strips down the sides of the can
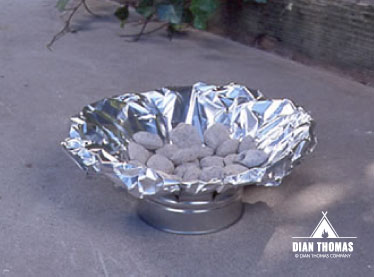
Line the tin can with heavy duty foil before adding charcoal
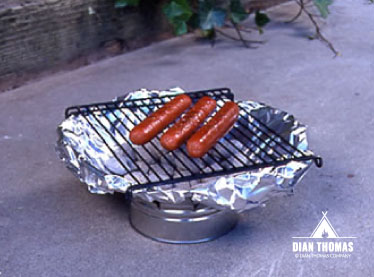
Add a rack, and you’re ready to grill
Unique Improvised Grills
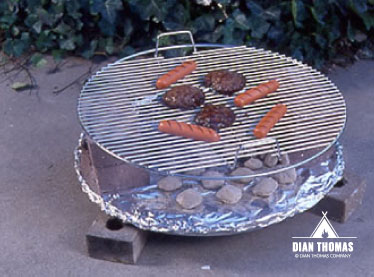
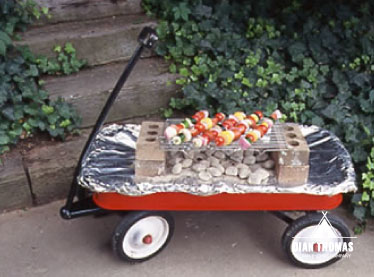
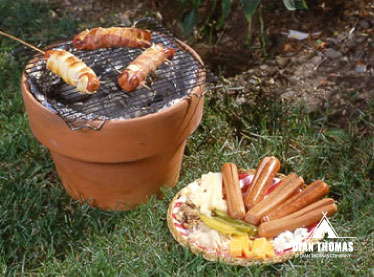
If you don’t own a barbecue or if you are having a “dry run,” enjoying a day at the beach, visiting a picnic area, or camping in your backyard, you might be happy with a child’s wagon grill, a wheelbarrow grill, a metal garbage can lid, or even a terra-cotta flowerpot.
The wagon or the wheelbarrow might tote your supplies to your site. Adapting it for grilling is as easy as filling the base with 6 inches of gravel, sand or dirt to insulate the bottom from the heat. Cover the dirt with extra-heavy-duty aluminum foil, which prevents coals from sinking into the dirt and insures that air will circulate. On top of the foil in the center make a pyramid of charcoal briquettes.
Pour lighter fluid over the charcoal and light. Drape a pair of oven mitts over the wagon tongue or wheelbarrow handles so they’ll be close by when needed. When briquettes are burning, arrange bricks around the outside edge, adapting them for the gill or rotisserie. If you simply want to do stick cooking, omit the bricks. The most efficient height for grilling is 3 to 4 inches about the coals.
Dirt can be stored between uses by covering the wheelbarrow or wagon with an old plastic tablecloth with Velcro stitched to seal the corners. Moisture will rust out the bottom of the wagon or wheelbarrow if it gets wet.


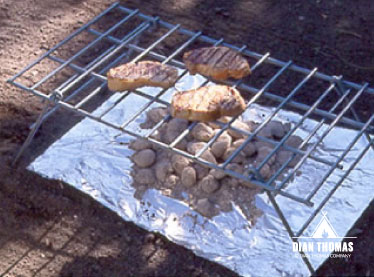
Backpacker’s Grill
A backpacker’s rack can be purchased from a sporting goods store. To use the backpacker’s grill, place coals on the ground; the backpacker’s rack sits on legs about 4 to 8 inches above. If
the dirt is loose or sandy, assure uniform heat by placing a piece of heavy-duty aluminum foil over the dirt to keep the briquettes from settling into the sand and causing the briquettes to lose heat.
The heat for the backpacker’s grill is very simple to regulate. To increase heat, simply push the rack toward the ground. To decrease heat, raise the rack farther from the coals.